How to Setup Eslint in a Vite React Project

Software Developer currently exploring the fascinating world of Blockchains
React is a popular JavaScript library in the sphere of frontend development. React makes it easy for developers to build user interfaces on reusable UI components. I recently started using Vite to scaffold some of my React projects and it's being wonderful so far.
Although amazing, using Vite with React still has it's downsides as it's still relatively new. If you've already used another build tool like CRA, you know that ESLint comes bundled by default. However, in Vite, we have to do it manually.
In this article, we'll learn about Vite and how to setup ESlint in a vite project.
Prerequisites
- Node.js 14.8+ or higher
- Basic Knowledge of JavaScript and how frameworks work
- Familiarity with a package manager like npm/yarn
One of the commonly used packages for scaffolding react projects is Create-React-App(CRA). CRA is a tool that generates the required files and folders to start a React application and run it on the browser. Under the hood, CRA uses babel to make your code readable by older browsers, and webpack as a module to put our application together.
Introducing Vite
Vite (french word for "quick" ) is a build tool that aims to provide a faster and leaner development experience for modern web projects. Vite leverages the availability of native ES modules or ESM in the browser, and the rise of JavaScript tools written in compile-to-native languages.
Vite(ESbuild) vs Create-React-App(Webpack)
CRA uses webpack under the hood for bundling. Webpack is a JavaScript-based module bundler that puts everything needed by your application together. To do this, webpack takes all your JavaScript files and other assets and transforms them into one huge file.
This big file is then sent by the server to a client's browser. This is one of the pain points of using webpack as building an app and starting the development server can take a lot of time.
Also, webpack rebuilds the entire app on each update/browser refresh. Even with HMR(Hot Module Replacement), file edits can take while before being reflected on the browser. The speed of HMR decreases as the file size grows.
When working with large applications, this can double your development time.

Webpack's development server takes 50years to start!
Vite, on the other hand makes use of ESbuild.
ESBuild is a bundler written in Go and pre-bundles dependencies 10-100x faster than JavaScript-based bundlers (coughs webpack).
Vite serves source code over native ESM. This is essentially letting the browser take over part of the job of a bundler: Vite only needs to transform and serve source code on demand, as the browser requests it. Code behind conditional dynamic imports is only processed if actually used on the current screen.
In Vite, HMR is performed over native ESM. When a file is edited, Vite only needs to precisely invalidate the chain between the edited module and its closest HMR boundary (most of the time only the module itself). Thus, HMR in Vite is fast regardless of the size of your app.
Vite's development server takes seconds to start.
Setting up a React, Vite and ESLint
To scaffold a new project, run the following in your terminal
npm create vite@latest
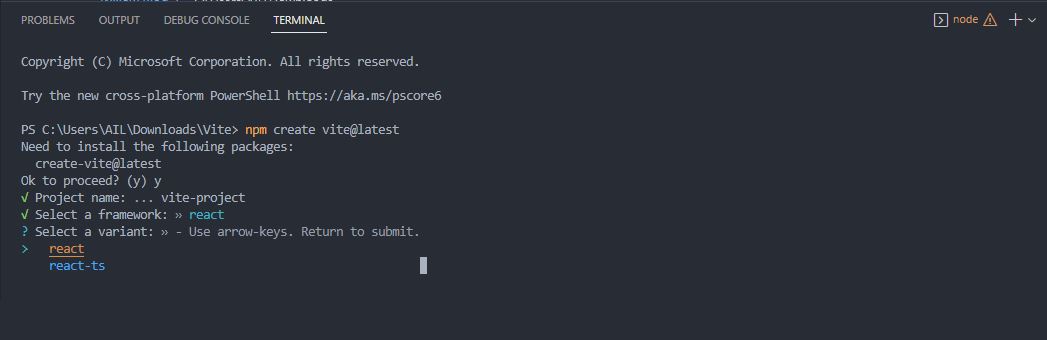
Choose a project name and select the React template. Follow the on-screen instructions to complete the setup, as seen below:
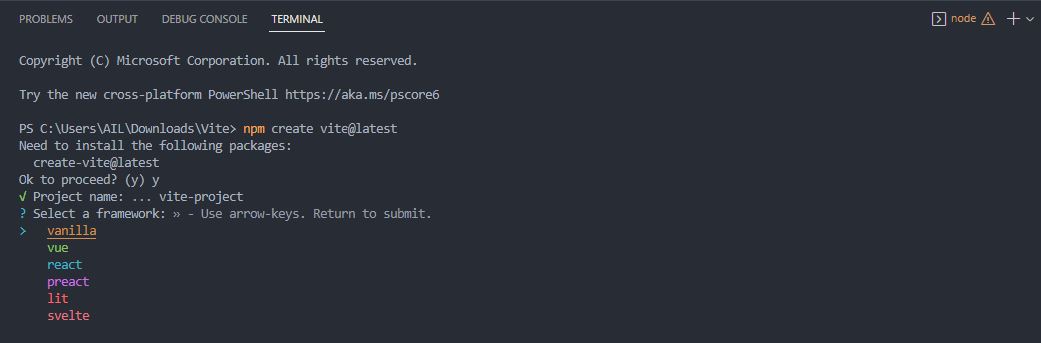
You have the option of picking a React(JavaScript or TypeScript) project. For the purpose of this article, we'll use the JavaScript project.
Next, install the app dependencies and dev server by running the following commands:
cd vite-project #navigate into the project's folder
npm install #installs dependencies
npm run dev #start dev server
Great, we have our React project setup

Now, we'll integrate ESLint into our project.
When scaffolding a React project with Create-React-App, ESLint is included by default. Vite doesn't automatically add ESLint for us, which means we have to add it ourselves.
Fortunately, the team behind CRA have added their ESLlint rules into a dedicated package. To install, run the following command in your terminal.
npm install --save-dev eslint-config-react-app eslint
Then, create a .eslintrc.json file with this code
{
  "extends": "react-app"
}
Then, add this to the scripts part of your package.json file.
{
    "scripts": {
        "lint": "eslint --max-warnings=0"
      }
}
The scripts part of your package.json file should look like this:

Finally, run the "lint" script via "npm run lint" on your terminal.

